Product Instructions
Welcome to E-Sea Co's Product Instruction Page.
Here you will find a quick step by step guide for installing and using our products. For more information and ways to use our products, click on the desired product title below or Contact Us for more help.
________________________________________________________________________________________________________________________________
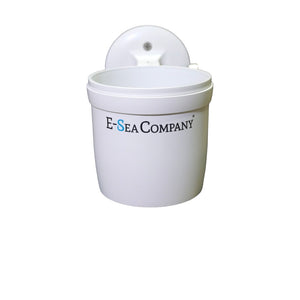
E-Sea Cup Original - Black & White
Click HERE for YouTube Instructions
To Install:
- Clean and dry the surface where the E-Sea Cup will be mounted before applying the suction mount. Do not moisten the suction cup.
- Place the suction cup on the smooth surface, pressing firmly on the center screw.
- Position the E-Sea Cup onto the suction cup and begin to spin the cup in a clockwise direction.
- After 5 full turns (10 short turns), the suction mount is fully tightened. Do not overtighten.
- If mounting surface is rough or porous, use our 3m adhesive E-Sea Mounting Discs (Sold separately).
To Remove:
- Twist the E-Sea Cup mount counterclockwise until fully unscrewed from the suction cup.
- With your fingernails, lift the outer edge of the suction cup and pull it away from the mounting surface.
*Remove and re-install before next use.
________________________________________________________________________________________________________________________________
E-Sea Cup Adjustable - Black & White
To Install:
- Clean and dry the surface where the E-Sea Cup Adjustable will be mounted before applying the suction mount. Do not moisten the suction cup.
- Place the suction cup on the smooth surface, pressing firmly on the center screw.
- Position the adjustable angle mount onto the suction cup and begin to spin the cup in a clockwise direction.
- After 5 full turns (10 short turns), the suction mount is fully tightened. Do not overtighten.
- Align the cup holder adapter onto the angle mount, then thread the thumbscrew to secure both.
- If mounting surface is rough or porous, use our 3m adhesive E-Sea Mounting Discs (Sold separately).
To Remove:
- Remove thumbscrew from the cup holder and adjustable angle assembly.
- Twist the adjustable angle mount counterclockwise until fully unscrewed from the suction cup.
- With your fingernails, lift the outer edge of the suction cup and pull it away from the mounting surface.
*Remove and re-install before next use.
________________________________________________________________________________________________________________________________
E-Sea Opener
To Install:
- Clean and dry the surface where the E-Sea Opener will be mounted before applying the suction mount. Do not moisten the suction cup.
- Place the suction cup on the smooth surface, pressing firmly on the center screw.
- Position the E-Sea Opener onto the suction cup and begin to spin the mount in a clockwise direction.
- After 5 full turns (10 short turns), the suction mount is fully tightened. Do not overtighten.
- If mounting surface is rough or porous, use our 3m adhesive E-Sea Mounting Discs (Sold separately).
To Remove:
- Twist the E-Sea Opener mount counterclockwise until fully unscrewed from the suction cup.
- With your fingernails, lift the outer edge of the suction cup and pull it away from the mounting surface.
*Remove and re-install before next use.
________________________________________________________________________________________________________________________________
E-Sea Camera Mount
Click HERE For YouTube Instructions
To Install:
- Clean and dry the surface where the E-Sea Camera mount will be mounted before applying the suction mount. Do not moisten the suction cup.
- Place the suction cup on the smooth surface, pressing firmly on the center screw.
- Position the adjustable angle mount onto the suction cup and begin to spin the mount in a clockwise direction.
- After 5 full turns (10 short turns), the suction mount is fully tightened. Do not overtighten.
- Next, attach the action camera adapter onto the adjustable angle mount using the thumbscrew provided.
- Now you can attach most action cameras and secure using the remaining thumbscrew provided.
- If mounting surface is rough or porous, use our 3m adhesive E-Sea Mounting Discs (Sold separately).
To Remove:
- Unscrew thumbscrew from adjustable angle mount and remove your action camera.
- Twist the adjustable angle mount counterclockwise until fully unscrewed from the suction cup.
- With your fingernails, lift the outer edge of the suction cup and pull it away from the mounting surface.
*Remove and re-install before next use. ________________________________________________________________________________________________________________________________
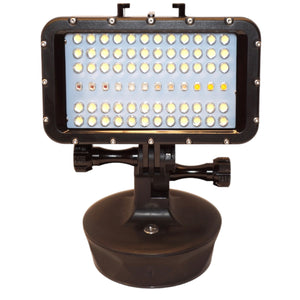
E-Sea Light
To Install:
- Clean and dry the surface where the E-Sea Light will be mounted before applying the suction mount. Do not moisten the suction cup.
- Place the suction cup on the smooth surface, pressing firmly on the center screw.
- Position the adjustable angle mount onto the suction cup and begin to spin the mount in a clockwise direction.
- After 5 full turns (10 short turns), the suction mount is fully tightened. Do not overtighten.
- Next, attach the action camera adapter onto the adjustable angle mount using the thumbscrew provided.
- Last, align the E-Sea Light onto the action camera adapter and secure using the thumbscrew provided.
- If mounting surface is rough or porous, use our 3m adhesive E-Sea Mounting Discs (Sold separately).
To Remove:
- Unscrew thumbscrew from adjustable angle mount and remove E-Sea Light.
- Twist the adjustable angle mount counterclockwise until fully unscrewed from the suction cup.
- With your fingernails, lift the outer edge of the suction cup and pull it away from the mounting surface.

*Remove and re-install before next use.
________________________________________________________________________________________________________________________________
E-Sea Mounting Discs
To Install:
- Clean and dry the surface where the E-Sea Mounting Discs will be mounted. Ensure surface is 100% dry and free of dust.
- For best results find the most flat surface to mount on
- Peel red backing from back of disc
- Apply disc to desired surface
- Press firmly on disc, ensuring no air pockets are underneath
- Discs will reach 100% adhesion after 24hrs
To Remove:
- *Removal not recommend.
- If necessary, soak with isopropyl alcohol and scrape with sharp blade
- After disc has been peeled back, apply adhesive remover to the left over foam debris
- Let soak for a few minutes, then rub with coarse sponge until clean
________________________________________________________________________________________________________________________________
E-Sea Tether
To Install:
- Pass large loop through center of cleat and wrap around both sides of cleat
- Press button down and slide to cinch loop closed
- Pass thumbscrew though small end loop to secure product
- OR
- Wrap large loop around a secure surface and pass the remaining tether through itself
- Press button down and slide to cinch loop closed
- Pass thumbscrew though small end loop to secure product
To Remove:
- Press button down and slide loosen large loop
**For use with tethering of handheld devices only, not to be used as a personal safety device.
________________________________________________________________________________________________________________________________
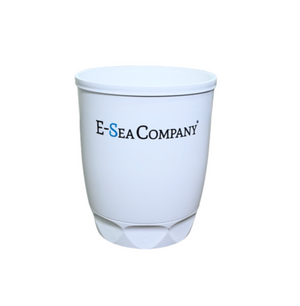
E-Sea Caddy Pro - Black & White
To Install:
- Clean and dry the surface where the E-Sea Caddy Pro will be mounted before applying the suction mount. Do not moisten the suction cup.
- Place the suction cup on the smooth surface, pressing firmly on the center screw.
- Position the single E-Sea Cup onto the suction cup and begin to spin the cup in a clockwise direction.
- After 5 full turns (10 short turns), the suction mount is fully tightened. Do not overtighten.
- Now, position the caddy over the top of the single E-Sea Cup and press down firmly until both thumb tabs have clipped onto the rim of the single E-Sea Cup.
- If mounting surface is rough or porous, use our 3m adhesive E-Sea Mounting Discs (Sold separately).
To Remove:
- Squeeze both thumb tabs (located on the top of the caddy, along the center cup) towards center cup.
- Pull the caddy off of the center E-Sea Cup and set aside.
- Twist the E-Sea Cup mount counterclockwise until fully unscrewed from the suction cup.
- With your fingernails, lift the outer edge of the suction cup and pull it away from the mounting surface.
*Remove and re-install before next use.
________________________________________________________________________________________________________________________________
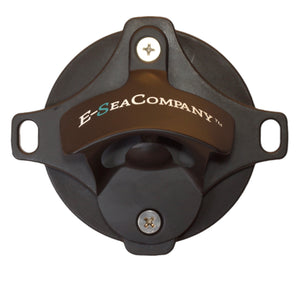
E-Sea Cleat
Click HERE For YouTube Instructions
To Install:
- Clean and dry the surface where the E-Sea Cleat will be mounted before applying the suction mount. Do not moisten the suction cup.
- Place the suction cup on the smooth surface, pressing firmly on the center screw.
- Position the E-Sea Cleat onto the suction cup and begin to spin the mount in a clockwise direction.
- After 5 full turns (10 short turns), the suction mount is fully tightened. Do not overtighten.
- If mounting surface is rough or porous, use our 3m adhesive E-Sea Mounting Discs (Sold separately).
To Remove:
- Twist the E-Sea Cleat mount counterclockwise until fully unscrewed from the suction cup.
- With your fingernails, lift the outer edge of the suction cup and pull it away from the mounting surface.
*Remove and re-install before next use.
________________________________________________________________________________________________________________________________
E-Sea Clip- Flatline Release Clip
To Install:
- Clean and dry the surface where the E-Sea Clip will be mounted before applying the suction mount. Do not moisten the suction cup.
- Place suction cup on smooth surface, pressing firmly on the center screw.
- Position E-Sea Clip onto the suction cup and begin to spin in a clockwise direction.
- After 5 full turns (10 short turns), the suction mount is fully tightened. Do not overtighten.
- If mounting surface is rough or porous, use our 3m adhesive E-Sea Mounting Discs (Sold separately).
To Remove:
- Twist the E-Sea Clip mount counterclockwise until fully unscrewed from the suction cup
- With fingernails, lift outer edge of suction cup and pull away from mounting surface.
*Remove and re-install before next use.
________________________________________________________________________________________________________________________________
E-Sea Paddle Holder
Click HERE for YouTube Instructions
To Install:
- Clean and dry the surface where the E-Sea Paddle Holder will be mounted before applying the suction mount. Do not moisten the suction cup.
- Place the suction cup on the smooth surface, pressing firmly on the center screw.
- Position the E-Sea Paddle Holder onto the suction cup and begin to spin the holder in a clockwise position.
- After 5 full turns (10 short turns), the suction mount is fully tightened. Do not overtighten.
- If mounting surface is rough or porous, use our 3m adhesive E-Sea Mounting Discs (Sold separately).
To Remove:
- Twist the E-Sea Paddle Holder mount counterclockwise until fully unscrewed from the suction cup.
- With your fingernails, lift the outer edge of the suction cup and pull away from the mounting surface.
*Remove and re-install before next use.
________________________________________________________________________________________________________________________________